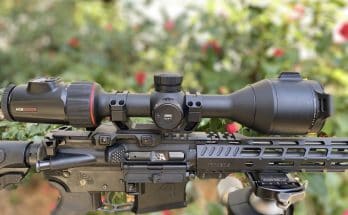
Do you know How To Bore Sight and Zero A Rifle Scope? – Bore sighting and zeroing a rifle scope is an essential process for any shooter, whether you have a new scope, a new rifle, or are seeking to improve accuracy with an existing setup. Understanding the intricacies of zeroing ensures that your point of aim aligns precisely with the bullet impact point at your desired zero distance.
Let’s explore step-by-step instructions and techniques about how to bore sight, adjust and zero a rifle scope. By following these guidelines, you will optimize your rifle’s performance and hit your targets consistently.
Get Your Laser Bore Sight Tool at AMAZON

Bore Sighter fits .177 to 12GA caliber scopes. (laser Class is IIIA l, max.output power is less than 5MW)
This laser Boresihgter Kit can accurately zero your scopes, optics & iron Sight, saving you time and money.
Amepointer laser bore sighter can conveniently add the press switch to the control. And it also can automatically adjust the focus function.
Green laser bore sighter, 2 * 800mAh CR2 Batteries, 24 * Adapters(fit .177 to 12GA Caliber),1 * Screwdriver,1 * Instructions.
__________________________________________________________________________________________________________________
Bore Sighting Your Scope
After you have your rifle scope securely mounted, here is how you bore sight and zero your scope. Start by bore sighting your rifle at a shorter distance, usually 25 yards. Bore sighting is how you verify that your scope is pointing close to the same place you see when you actually look through the barrel.
Bore sighting is a little easier with a bore sighting tool like the one from Amazon above but is not necessary. Bore sighting is only the first step. The next step is to fire at a paper target from a stable position at 25 yards to confirm where the bullet is hitting. You can not “zero” your scope with a bore sighting tool.
If you have a bolt action rifle you can remove the bolt and look through the barrel. If you have an AR-type rifle you can remove the upper and the bolt and look through the barrel to do a bore sighting.
For rifles like pumps or 22 autoloaders, you may need a bore sighting tool like a laser bore sighter to project a dot on a close target to align your scope. Follow the steps below to bore sight your rifle. Directions about how to adjust your rifle scope knobs are found below.
Bore sighting a rifle is the process of aligning the rifle’s bore with the sight or optic, such as a rifle scope. It helps establish an initial alignment between the barrel and the sight, allowing for easier and more accurate zeroing. Here’s a step-by-step guide on how to bore sight a rifle:
- Prepare a stable shooting platform: Place your rifle on a secure shooting rest or shooting bag to ensure it remains steady throughout the process. This helps minimize any movement or vibrations that can affect the accuracy of the bore sighting.
- Ensure the rifle is unloaded: Double-check that the rifle is unloaded and there is no ammunition present. Safety is of utmost importance, so always follow proper firearm safety procedures.
- Set up the target: Place a target at a distance of around 25 yards. Ensure the target is positioned securely and clearly visible.
- Choose a bore sighting method: There are several methods available for bore sighting a rifle. Here, we will discuss two common techniques: the visual method and the laser bore sighting method.a. Visual Method:
- Look through the barrel: Without looking through the scope or sight, position yourself behind the rifle in a way that you can see through the barrel.
- Align the reticle: Without moving the rifle, adjust the scope’s windage and elevation controls until the reticle (crosshairs) aligns with the center of the target.
- Insert the laser bore sighting device: Follow the manufacturer’s instructions to properly insert the laser bore sighting device into the rifle’s barrel. Ensure it fits snugly and securely.
- Activate the laser: Turn on the laser bore sight and align it with the target. The laser should project a dot onto the target.
- Align the reticle: While keeping the rifle steady, adjust the scope’s windage and elevation controls until the reticle aligns with the laser dot on the target.
- Check and fine-tune: After aligning the reticle with the bore using either method, check the alignment by visually inspecting through the barrel or activating the laser again. Make any necessary adjustments to ensure the reticle remains aligned with the bore.
DO NOT FORGET TO REMOVE THE BORE SIGHTING TOOL BEFORE SHOOTING!
- Remove the bore sighting device: Once you have achieved a satisfactory alignment between the bore and the sight, carefully remove the laser bore sighting device from the rifle’s barrel.
- Confirm alignment at the range: Bore sighting provides an initial alignment, but the final zeroing should be done at a suitable shooting range. Follow the manufacturer’s instructions to adjust the scope’s windage and elevation based on the specific shooting conditions and distances you plan to use.
Remember, bore sighting gets you close to the target, but it is not a substitute for proper zeroing and fine-tuning your rifle. Always follow safe firearm handling practices and refer to your specific rifle and optic manuals for any additional instructions or considerations.
Affordable American Made Leupold Rifle Scopes from AMAZON
Shop Leupold Rifle Scopes Starting at $299 at AMAZON
Zeroing Your Scope – First Shots
DO NOT FORGET TO REMOVE THE BORE SIGHTING TOOL BEFORE SHOOTING!
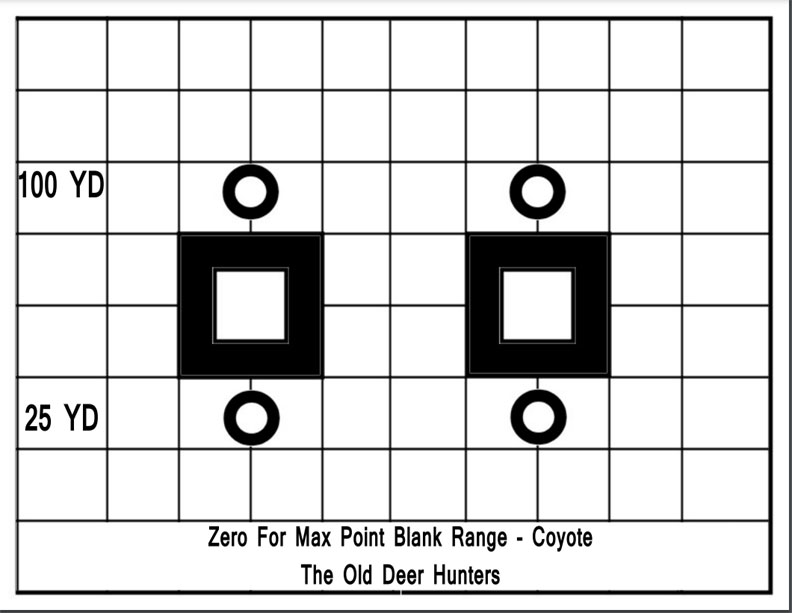
Your first shots after you bore sight your scope should be at 25 yards, the same distance you bore sighted your scope. You may need to adjust the ocular lens at the rear of the scope so you can clearly see the crosshair or aim reticle. Do not adjust your ocular lens to make the target clear. Lower the magnication if necessary to see the target clearly. Since your scope sits about 1.5-2″ above your bore, you need your bullets to impact the 25-yard target at about 1.5″ below the point of aim. I have made a target for you to make it a little easier.
Download Rifle Scope Zero Target
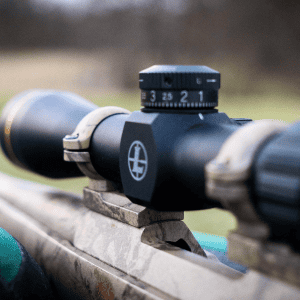
Rifle scope adjustment turrets are located on the top for elevation and right-hand side for windage ( left and right adjustment).
Download the target above (do not save the image) so it will be the correct size. The target grid squares size is 1″ so it will be easy to count the number of clicks needed to adjust your scope to move bullet impact.
Adjusting Scope Elevation & Windage
Most rifle scope turrets are made to move the bullet 1/4″ at 100 yards with each click on the turret. That means it takes 4 clicks to move the bullet impact 1″ at 100 yards and 16 clicks to move it 1″ at 25 yards.
When using the target above at 25 yards, aim at the square in the center, and adjust as necessary to move the bullet impact to hit the circle BELOW the square.
The scope turrets are marked with arrows right on windage knob and up on the elevation knob. If you hit low and you want the bullet impact to hit higher on the target, turn the elevation knob in the up direction. If you hit to the left of where you are aiming, turn the knob right to move there bullet impact more to the right.
If you are using the zero target above at 25 yards, you will need to move the dials about 16 clicks to move it 1″. At 50 yards it takes 8 clicks to move it 1″, and at 100 yards it takes 4 clicks to move the scope 1″.
If your scope dials are marked in Mils instead of MOA, it takes about 3 clicks to move one inch at 100 yards. How you adjust a rifle scope is the same except for the number of clicks to move the reticle.
Take enough shots so your bullet is hitting the center of the bottom circle at 25 yards. When the bullet is hitting the bottom circle at 25 yards it should be very close to hitting dead on the point of aim at 50 yards.
For 22LR rimfire rifles, move your target to 50 yards and fine-tune your bullet impact will hit inside the square at 50 yards. When the center of your group is in the center of the square, you are now zeroed for 50 yards.
For centerfire rifles, move the target to 100 yards to check the actual point of impact . When the bullet is hitting the bottom circle at 25 yards it should be very close to hitting dead on the point of aim at 50 yards, and about 2″ high at 100 yards. Adjust your scope so the impact of the bullet hits the square of the 100-yard target. If you have a good rest, you should be able to hit in or closely around the square aiming point. You are now zeroed for 100 yards.
If you are zeroing your rifle for deer or coyote hunting with calibers like the 223 Remington, 243 Winchester, or 30’06 you will want your bullet to impact in the top circle for a 200-yard zero. This is called zeroing for the maximum point-blank range. You aim at the center of the animal and you will hit it in the kill zone from 25-200 yards. Follow this link for more information about Maximum Point Blank Range.
Wheeler Torque Wrench For Scope Installation Save 19% at AMAZON
I hope this information is helpful to you. Remember SAFETY first on the range or on your hunt.
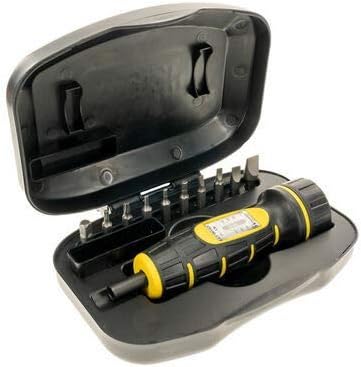
Apply, repeatable, accurate torque settings to scope rings, guard screws, windage screws and base screws, which aids in accuracy and decreases the opportunity for problems in the field
RELIABLE: Torque adjustment range from 10 inch/pounds to 65 inch/pounds DURABLE: Bits are made of S2 tool steel and hardened to 56-58 Rockwell “C”
INCLUDES: 10 bits (hex to square adapter, #10 flat blade, #32 flat blade, #11 flat blade, 5/32 hex, 7/64 hex, 3/32 hex, T20 torx, T15 torx and Leupold specialty flat blade), ¼” socket and a convenient plastic storage case
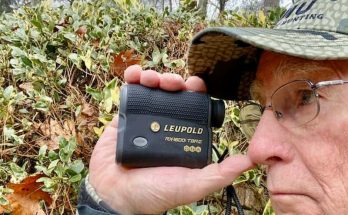
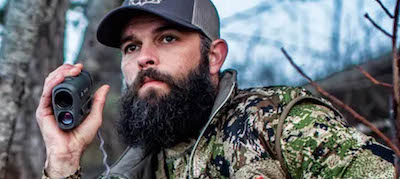
Laser Range Finder Is A Must With Your Rifle Scope
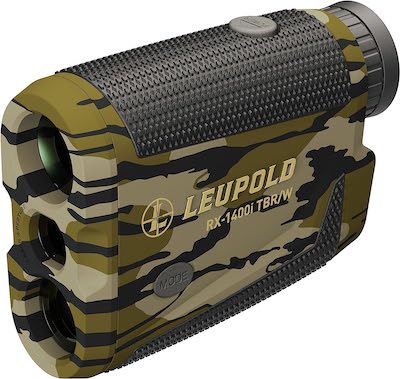
Vortex & Leupold Laser Rangefinders For Hunting Starting at $189 AMAZON
The VORTEX Ranger with 7x magnification and a 25mm objective lens is the essential companion for the extreme hunter, archer, and shooter. Tripod Adapter compatibility allows the Razor to be used on a tripod or car window mount.
When your scope is zeroed, you still need to know the range of your target, especially when your are hunting with a 22LR or long-range with a centerfire rifle.
Hunters rely on laser range finders as valuable tools for enhancing their accuracy and effectiveness in the field. These devices utilize advanced technology to measure the precise distance between the hunter and the target. Here are some reasons why hunters find laser range finders essential:
1. Improved Shot Placement: Accurately knowing the distance to the target is crucial for making precise shot placements. By determining the exact range, hunters can compensate for bullet drop and adjust their aim accordingly, increasing the chances of a clean and ethical kill. Laser range finders enable hunters to quickly and accurately assess the distance, leading to more accurate shots.
2. Ethical Hunting: Ethical hunting practices emphasize clean, humane kills that minimize animal suffering. A laser range finder helps hunters assess the distance to the target, ensuring they have the right equipment and shooting skills for a quick and effective kill. It allows hunters to make responsible decisions.
3. Confidence and Success: Hunting often involves challenging and unpredictable situations. A laser range finder offers hunters confidence by providing them with reliable and precise distance measurements. With accurate range information at their disposal, hunters can make calculated decisions, select appropriate ammunition, and execute shots with confidence, increasing their chances of success in the field.
Overall, a laser range finder is a valuable tool for hunters, offering accurate distance measurements that enhance shot placement, ethical hunting practices, strategic positioning, long-range shooting capabilities, and safety. By incorporating this device into their gear, hunters can improve their effectiveness and increase their chances of a successful and responsible hunting experience.
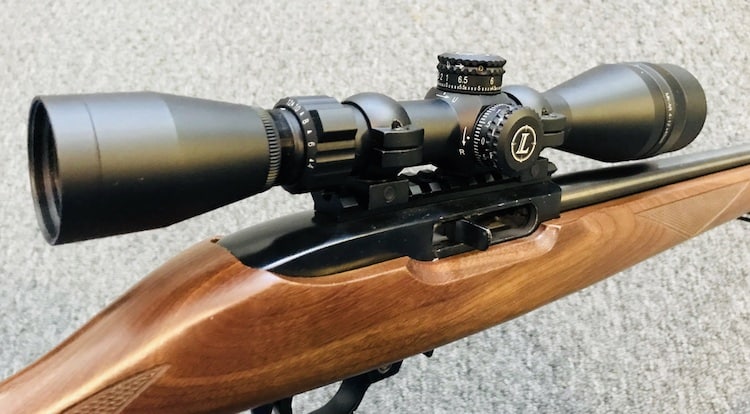
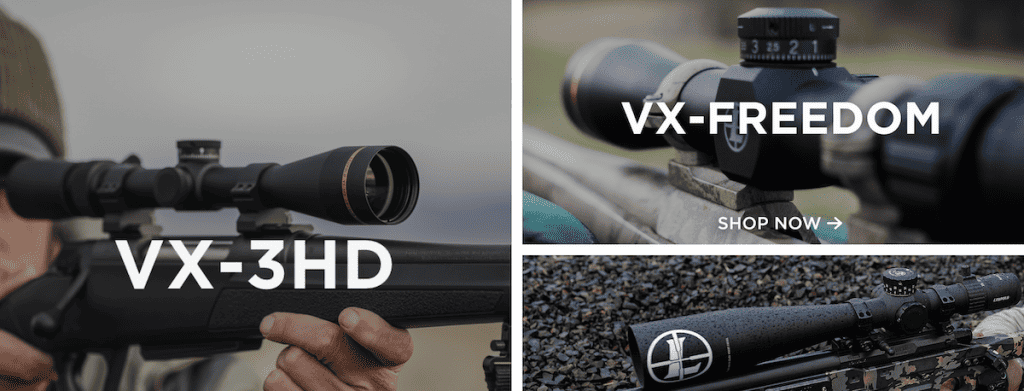
What Scope Should I Buy For My Rifle?
If you are a new rifle shooter or deer hunter, you may ask yourself “What rifle scope should I buy for my rifle?” My answer depends on whether you are shooting a 22LR rimfire rifle or a centerfire deer hunting rifle. Of course there are dozens of options, but here is my short answer.
For a 22LR caliber rifle, I suggest a Leupold Freedom 3x9x40 Rimfire Scope
Leupold VX-Freedom 3-9x40mm Riflescope, Rimfire MOA Reticle
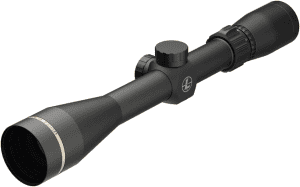
Leupold VX-Freedom 3-9x40mm Riflescope, Rimfire MOA $295 at AMAZON
Lifetime warranty, made specifically for 22LR so that it has a clear image at any magnification at 25-75 yards, the distance most 22LR shots are made. Great reticle and great image quality. Buy once for lifetime of shooting.
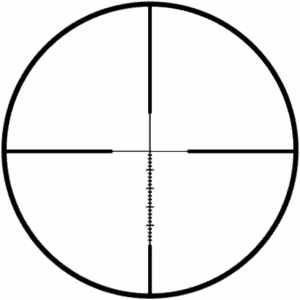
Rimfire MOA Reticle
Based on Leupold’s T-MOA reticle. Consists of wide 5 MOA hash for quick reference and thin crosshairs for precision aiming. Features 25 MOA of bullet drop measurement in 1 MOA increments. Great for rimfire specific targets.
For a centerfire rifle like a 30’06 or or 243 Winchester that is used for hunting deer, I suggest a Leupold Freedom 3x9x40 CDS rifle scope. Of course you will ask why that scope?
Leupold VX-Freedom 3-9x40mm CDS Riflescope
Leupold VX-Freedom 3-9x40mm CDS Riflescope $298 at AMAZON
Leupold scopes are made in America and have a lifetime warranty that is transferable to anyone who ever owns the scope. You will never have to worry about a warranty even if you buy second-hand. They are easy to sell because they hold their value well.
The low power of 3X has a wide field of view for hunting in the woods at close range and plenty of magnification for shots out past 200 yards at 9X. The scope is very lightweight and mounts easily with 1″ scope mounts. The 40mm objective lens brings in plenty of light in low light conditions and there are several reticles or crosshairs to choose from.
The CDS system lets you get a free elevation turret matched to your rifle caliber so you can dial in a specific yardage, hold dead on, and make the shot. Leupold is the only scope with the CDS system.
You will never need a more expensive scope. You buy once and hunt for a lifetime.
Leupold Custom Dial System (CDS)
The Leupold Custom Dial System (CDS) is a feature offered by Leupold on some of their rifle scopes that allows shooters to easily adjust for bullet drop at different distances. The CDS system is designed to simplify the process of making accurate long-range shots by customizing the elevation adjustments on the scope’s turret to match the specific ballistics of the shooter’s rifle and ammunition.
Here’s how the Leupold CDS system works:
Ballistic Information: To use the CDS system, the shooter needs to provide Leupold with information about their rifle, ammunition, and the ballistic trajectory of their bullet. This includes details like the caliber, bullet weight, muzzle velocity, and other ballistic data.
Custom Turret Dial: Based on the provided ballistic information, Leupold creates a custom elevation turret with specific markings that correspond to different distances. Each marking is calibrated to adjust for the bullet drop at that particular range.
Easy Installation: The shooter receives the custom turret dial along with their Leupold scope. Installing the custom turret is straightforward and usually involves removing the standard turret cap and replacing it with the CDS turret. The turret is secured to the scope and aligned properly.
Dialing for Distance: Once the CDS turret is installed, the shooter can quickly and easily adjust the elevation turret to the appropriate distance. Instead of having to calculate holdover or make complex adjustments, the shooter simply turns the turret to the marked distance on the custom dial.
Accuracy and Precision: Since the CDS turret is calibrated for the specific ballistics of the rifle and ammunition, it provides a more accurate and precise solution for adjusting for bullet drop at different distances. This can greatly simplify the process of making accurate shots, particularly at extended ranges.
Flexibility: The CDS system is flexible and can be used for various shooting scenarios. Shooters can have multiple custom dials calibrated for different loads, making it easy to switch between ammunition types or shooting conditions.
The Leupold CDS system is especially beneficial for hunters and shooters who engage targets at varying distances and want to avoid the mental calculations required for holdover or complicated turret adjustments. By providing a custom dial that matches the rifle’s ballistics, Leupold aims to make long-range shooting more accessible and accurate for a wide range of shooters.
Awesafe Gun Safe, Biometric Gun Safe for Pistols*
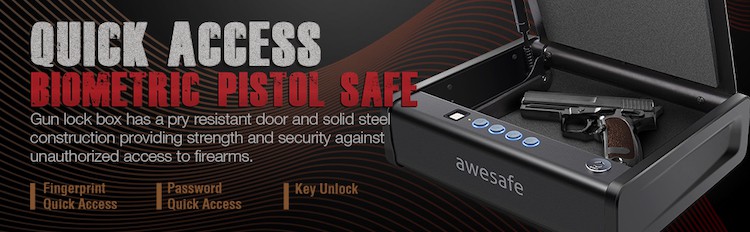
Awesafe Single Bedside Gun Safe $65 at AMAZON
Rifle Scope Terms
Adjustment Dials: Knobs or controls on a scope that allows for adjustments to windage and elevation settings.
Adjustment Turrets: Knobs or dials on a scope are used to make precise adjustments to the windage and elevation settings.
Adjustable Objective: A feature on some scopes that allows for adjusting the focus of the objective lens on the front end of the scope to minimize parallax.
Angular Measurement: A unit of measurement used to quantify angles, such as the Minute of Angle (MOA) or milliradian (mil).
Bolt Action Rifle: A type of firearm that requires manually operating a bolt mechanism to chamber a new round.
Bore Sighting: Aligning the barrel of a firearm with the line of sight of scope to facilitate initial sight alignment.
Bullet Drop: How much a bullet falls due to the influence of gravity.
Bullet Impact Point: The exact spot where a bullet makes contact with the target.
Click Adjustments: The incremental adjustments made to the windage and elevation settings on a scope using audible or tactile clicks.
Crosshair: The reticle or cross marks in the center of the scope used to aim at a target.
Diopter Adjustment: The adjustment of the ocular lens on a scope to achieve optimal focus of the crosshair or reticle.
Elevation Adjustments: Changes made to the vertical alignment of the scope’s reticle to compensate for bullet drop at different distances.
Elevation Dial: A turret or dial on a scope used for making adjustments to the vertical alignment of the reticle.
Elevation Turret: A knob or dial on a scope used specifically for making adjustments to the vertical alignment of the reticle.
Erector Assembly: The internal mechanism of a scope that adjusts the position of the reticle in response to windage and elevation adjustments.
Eye Relief: The distance between the ocular lens of the scope and the shooter’s eye at which the full field of view can be seen without image blackouts or vignetting.
Focal Plane: The plane in a scope where the reticle is positioned.
Hunting Rifle: A firearm designed and used specifically for hunting purposes.
Impact of the Bullet: The effect or consequence produced by a bullet striking a target.
Laser Bore Sight: A device that emits a laser beam aligned with the bore axis of a firearm to assist in aligning the scope.
Main Tube: The central cylindrical body of a scope that houses the erector assembly and provides structural support.
Magnification Adjustment: The ability to change the level of magnification on a scope to zoom in or out on the target.
Magnification Setting: The specific level of magnification selected on a scope.
MAXIMUM Point Blank Range: Distance at which you can hold center of the target and hit it.
Minute of Angle: A unit of angular measurement commonly used to express the adjustment values on a scope.
Muzzle Velocity: The speed at which a projectile leaves the muzzle of a firearm.
Number of Clicks: The quantity of audible or tactile increments made while adjusting windage or elevation on a scope.
Objective Lens: The front lens of a scope that collects and focuses light onto the reticle.
Ocular Focus Adjustment: The adjustment of the ocular lens on a scope to achieve optimal focus for the shooter’s eye.
Ocular Lens: The eyepiece lens of a scope through which the shooter looks to see the target.
Parallax Adjustment: The adjustment made to minimize parallax error in a scope, ensuring that the reticle remains in focus with the target regardless of the shooter’s eye position.
Point of Aim: The specific spot on the target that a shooter intends to hit.
Power Ring: The adjustable ring on a scope that controls the level of magnification.
Rear Sight: A sighting device located at the back of a firearm, typically used in conjunction with a front sight.
Reticle: The crosshair or dot in the center of the scope used to aim at the target.
Rifle Scope: A telescopic sight specifically designed for use on rifles.
Scope Adjustments: Changes made to the settings or configuration of a scope to improve accuracy or align the point of impact.
Scope Dial: A rotating mechanism on a scope used to make adjustments to windage and elevation settings.
Scope Mount: The device used to attach a scope to a firearm securely.
Scoped Rifle: A rifle equipped with a mounted scope for enhanced accuracy and precision.
Shooting Rest: A support or stand used to stabilize a firearm for improved shooting accuracy.
Side Focus: A feature on some scopes that allows for adjusting parallax by moving the focus adjustment control to the side of the scope.
Side Turret: A knob or dial on the side of a scope used for making windage adjustments.
Spotting Scope: A portable telescope-like optical device used for observing and analyzing distant targets.
Telescopic Sights: Optical sighting devices commonly referred to as rifle scopes.
Three-Shot Group: A cluster or pattern formed by three consecutive shots fired at a target.
Top Turret: A knob or dial on the top of a scope used for making elevation adjustments.
Windage Adjustment: Changes made to the horizontal alignment of the scope’s reticle to compensate for wind drift.
Windage Turret: A knob or dial on a scope used specifically for making adjustments to the horizontal alignment of the reticle.
Zero Distance: The specific distance at which the point of aim and the point of impact coincide, resulting in zeroing the rifle scope.
Zero Range: The distance at which a rifle or scope is zeroed or calibrated to ensure accurate aiming and shooting.